Meal Planning – The Key to Healthy Eating On A Budget

If you know me at all, you know that I absolutely swear by planning our meals. Chris and I get paid every Monday, so it just makes sense for us to plan our meals weekly instead of monthly. I also find that this allows us to be more flexible and add different events to our calendar as things come along, without wasting food that we’ve already bought if those events include dinners out or at someone else’s house.

Before we get into it all, I realize that every family has a different schedule, different needs, different dietary requirements or preferences, and a different budget. So I’m just sharing what works for us, in hopes of inspiring healthy eating on a budget in your household. In no way do you have to copy exactly what we do, although you are welcome to do so!

My goals in meal planning are:

  1. Committing to eating a healthy, balanced diet while on a budget. If you’ve already planned what you’re going to eat and already have the food bought, you’re way more likely to actually cook that healthy meal!
  2. Minimal trips to the grocery store each week (saves time, less stress while shopping with children, and cuts down on unnecessary purchases)
  3.  Providing my family with home-cooked meals around the dinner table, as many nights of the week as possible. Eating out is great, but we like for it to be a special treat for our family instead of the norm. I grew up treasuring our times around the dinner table as a family – I remember lots of giggling, lots of stories shared and lots of important conversations and bonding.

One thing that has helped me to stay on top of meal planning is a good notebook. I don’t know if it simply makes me feel like I want to do it every week because it’s a cool notepad, or if it’s actually helpful…but for whatever reason, I really love my meal planning pad! I will say though, I’ve been meal planning for years without this cool notepad, so you don’t have to get one to be successful. Mine looks like this (pictured below) and my aunt actually got it for me on Amazon.com. Click here if you’d like to order one for yourself. It’s awesome and helps me to think about breakfasts, lunches and snacks, which I’d previously not been very good at remembering to do!

91EpKs4OavL

Are you still with me? I know this is a lengthy post, so I’ll try to make it as concise as possible! Here are the steps I take every week:

STEP 1: On Thursday or Friday, I open my calendar and look at what’s going on the following week, starting on Monday. This way I can assess what evenings we have booked up and whether or not I need to cook on those nights. I also look at nights that I’ll be rushed and need something quick, or nights that I’ll have time to cook a more involved dinner. We have a few events that happen every week – for example I know I’ll need to make something easily transportable to take to the boys at band practice at church on Wednesday nights, and I also know I’ll want to have a crockpot lunch pretty much every Sunday because we all get back home at around 1:30pm starving and not wanting to wait for a meal to be cooked!

STEP 2: I look at the weather (I’m one of those funny cooks that likes to have cozy meals on cold days, and grilled meat/salads on hot days) and I look at what we had the previous week. I get bored quite easily so I like to change it up and keep things interesting. That being said, Indian food is a family favorite around here, so we usually end up having some kind of curry one night per week. I also try to incorporate two high protein vegetarian meals per week. All the poultry we buy is organic (we don’t have red meat too often) so it can get expensive if we eat meat at every meal. This has been a long process with my husband, but in the last few years he has really learned to love vegetarian meals, as long as they have enough protein to sustain him for the evening.

STEP 3: I start thinking of what dinners I’d like to cook/eat that week. I look at my blog very often, as I really do make those recipes very often. I look on Pinterest, and then in some of my recipe books if I have time. Then I start writing them down on a piece of paper that will eventually become my shopping list. It kind of looks like this:

M – Italian Chicken Quinoa ; T – Roasted Veggie Quiche with roasted potatoes and salad ; W – (boys at band practice) Spaghetti Bolognese ; T – Minestrone Soup ; F – Dinner at the Smiths, take dessert ; S – Chicken Tikka Masala with basmati rice and naan ; S – Crockpot 3 Bean Turkey Chili

STEP 4: I write down what I’ll need to buy for the week. I know that with some staples like quinoa and basmati rice, I can make one bag of each stretch for two meals. Since those things don’t spoil, I don’t have to have both of those quinoa meals or both of those basmati rice meals in one week. I keep a running list each week of household items that we have run out of like toilet paper and paper towels, as well as staples that don’t have to buy every week like coffee, cereal, butter , parmesan cheese etc. I also have a list of things that I basically buy every week like eggs, milk, bread, bananas, pita chips, clorox wipes etc. I also think about breakfast and lunch a little bit. These aren’t as planned as our dinners because our days can get crazy, and our schedule can change at any moment. Breakfasts usually consist of eggs, toast, oatmeal (which I buy a big tub of every now and then and it lasts for quite a while), or cereal.  For lunch I usually have some things in the freezer or in the cupboard that won’t go bad if I don’t use them that week – stuff like organic mac and cheese, frozen cheese tortellini, these amazing indian lentil boxes that can be served with rice and/or spinach etc. We often eat leftovers for lunch as well, or if there are some fresh ingredients leftover from a meal we’ve already eaten (like salad stuff or some beans or something) I’ll throw something together adding staples I have in the cupboard like pasta or couscous.

hang

Ok, hang in there, I’m almost done! This does seem like a lengthy process with a lot of extra effort, but I promise once you get into the swing of things it’ll be a time, money and effort saver for you like it is for me.

STEP 5: I go to the grocery store! I write my shopping list in the order that I go around the store. This may seem like overkill to some, but for me it gets me in and out of the store much quicker, and actually helps to prevent me from impulse buys for the most part. Every week I visit two stores, preferably on the same day. For me it’s a local grocery store called Ingles, and then Trader Joe’s which takes me about 20 minutes to get to. The money I save by shopping at Trader Joe’s is well worth the drive! Because of this, I make two separate lists. I’ve learned what is cheaper and/or better quality at each store. For example I buy stuff like toilet paper, cleaning products and bananas at Ingles, but things like organic milk, basmati rice, quinoa and most of their produce are cheaper at Trader Joe’s, and they generally hold their products to a higher standard (they promise no MSG, artificial flavors or preservatives, genetically modified ingredients, artificial trans-fats etc.) so I feel happy buying extra little snacks for our family there.

EXTRA TIPS AND WAYS TO SAVE:

  • If you’re going to try this meal planning thing, you HAVE TO commit. Of course there’s always room to switch meals to different days (as long as you’re ingredients aren’t going bad that day), and oftentimes something will pop us with us and we’ll have to push a meal to the following week (I usually try to pick a meal that has ingredients we can freeze or keep fresh for a good amount of time), but the bottom line is if you’ve bought the ingredients, you need to use them. Of course we all have days where we’re busier than we thought we’d be and the last thing we want to do is cook a big meal or sometime we’re not in the mood for the meal we have planned, but it is worth it to stick to the plan. I promise. We have saved so much money by being disciplined in this way, and we eat way healthier because of it. Goodbye last minute pizza order from Papa John’s!
  • If I know I have to buy a more expensive ingredient for one meal (like Thai red curry paste, or a certain vegetable/herb that I don’t usually get), I’ll try to make sure I can incorporate it into another meal either that week or the following week.  That cuts down on waste and helps to justify that added expense a little bit.
  • Learn the prices and quality of products at different stores. You may be surprised to find that something you thought was cheaper at one store, actually isn’t. I buy my bananas, potatoes and cilantro from Ingles instead of Trader Joe’s because I find they last longer. Weird! Alot of people also shop at stores like Aldi, which does have some great deals, but I’m not in a position to add another stop to my weekly shopping. It’s all about finding what store/s work for you!

This was a very long post and I’m sure I’ve forgotten some bits and pieces (I’ll come back and add them in if necessary), but I hope that in some small way this has helped you feel like meal planning is more attainable for your family, and inspired you to commit to your budget and to eating healthier. Healthy eating doesn’t have to be expensive or intimidating, and it can be VERY YUMMY if you know what to cook. Unless you have strong convictions or heavy allergies, you don’t have to be extreme and go fully vegan, or gluten free or anything like that (often that’s not actually sustainable for a lot of people, and then they just go back to fast food and takeout!), just make simple choices for a balanced diet for your family. You won’t regret it!

If you have any questions to ask or extra tips and tricks to share, please comment and let me know! Thanks for sticking with me 🙂


Meal Planning – The Key to Healthy Eating On A Budget

Quick & Easy Energy Bites

image

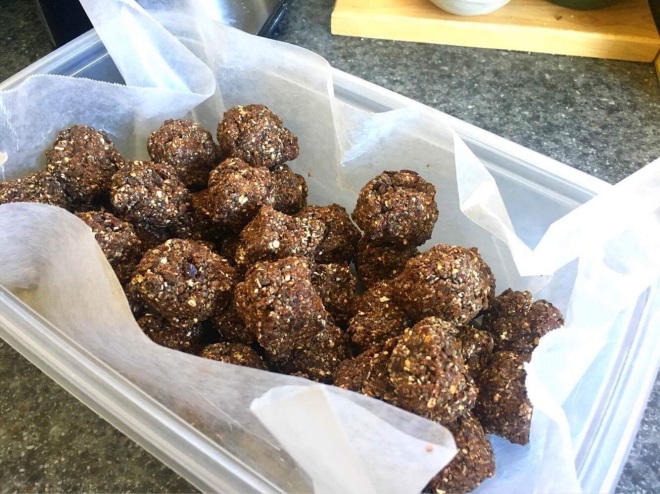
During this pregnancy, these Energy Bites have been SO great to grab on the go! They’re full of ingredients that are really good for you like oats, dates, and chia seeds, and they’re also full of yummy things like dark chocolate and honey. This recipe took a few tries for Eleni and I to develop, but we really feel like the one I’m sharing with you is the best version! Eleni loves to make these with me, and they’re pretty kid-friendly so I often let her put the ingredients into the food processor, and once everything’s chopped I give her some mixture to make her own bites with. I always encourage parents to include their children in the kitchen as much as possible, and this is an easy way to do that!

image


Makes about 40 bites

1 cup good dark chocolate

1 1/2 cups pitted dates (or if they’re not pitted, remove the pits!)

1/2 cup raisins

1 1/4 cup uncooked quick oats

1 cup chia seeds (it’s my preference to use ground chia seeds, but I’ve made these several times with whole ones and they’re just as good!)

1 tsp salt

1 1/2 tsp vanilla extract

1/4 cup honey

image

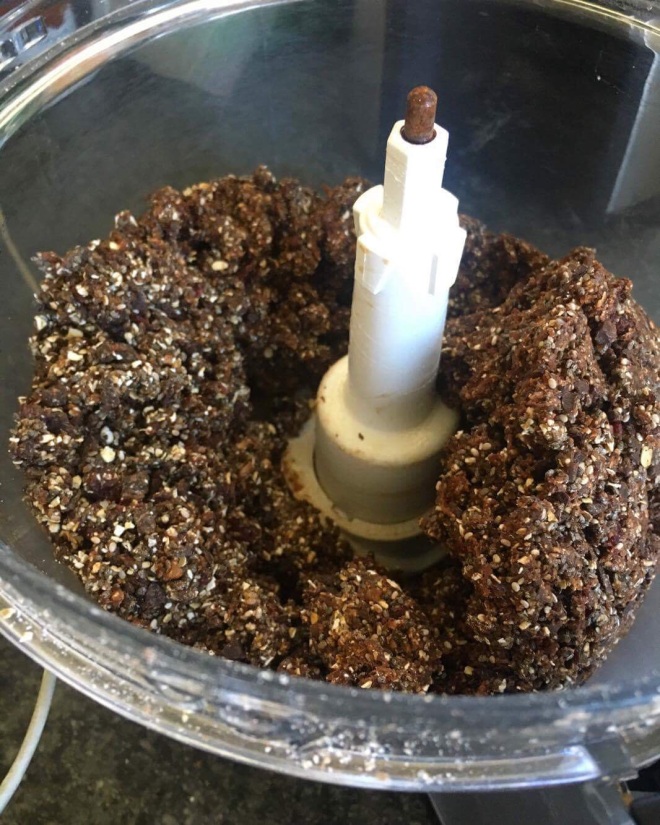
– Put all of the ingredients into your food processor in the order that they’re listed above, and chop them up until quite small. Then, taking small bits at a time, roll the mixture into bite-sized balls and put them on top of wax paper in a Tupperware container. Refrigerate for +/- 30 minutes before eating, and then store them in the refrigerator for up to a week (I must mention, I’m sure they could last more than a week but because these are so popular at my house, they have never lasted more than a week for us before being all eaten up!) Enjoy!


Quick & Easy Energy Bites

My Mama’s Caramel Delights

caramel-delight

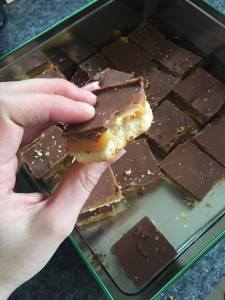
It seems that I’ve caused somewhat of a stir with these sweet treats! Everyone and their Great Aunt is asking for this recipe, so here it is. My Mom has been making these for as long as I can remember, and I even remember her having to hide them and ration them out to us four children and my Dad! Of course the beauty is that now I’m a grown up and I can have as many as I want, whenever I want 😉 I do apologize to those who have asked for this recipe, it’s taken me a little while to put this up because all my Mom’s measurements were British, so I had to convert them for you!

SHORTBREAD BASE:

4oz soft margarine (these English recipes are the only time I ever use marg, but my friend did make these with real butter a few days ago and said they taste just as good, so feel free to use butter instead!)

1/4 cup superfine granulated sugar

1 cup self rising flour

CARAMEL MIDDLE LAYER:

4oz soft margarine

1/2 cup superfine granulated sugar

2 tbsp golden syrup (this is usually imported from England, I found Lyle’s Golden Syrup in a random section of my local, small-town grocery store. It was about $4, but it keeps for a long time and you only use 2 tbsp at a time, so I see it as a worthy investment)

1 tin (14.5oz) sweetened condensed milk

CHOCOLATE:

2 x 3.5oz Cadbury’s Dairy Milk Chocolate (you could probably use Ghirardelli if you can’t find Cadbury’s, but I’d never recommend using Hershey’s chocolate. This needs to be nice and creamy, good quality chocolate)

caramel-delight-2

– SHORTBREAD BASE: Preheat your oven to 350F and line a 9x9in square tin with parchment paper. Cream the margarine and sugar together with an electric mixer, and then fold in the flour. Mix well! The mixture will be crumbly since it’s shortbread. Pour into your square tin and pat down lightly with the back of a metal spoon. Bake for 20 minutes until nice and golden brown.

– CARAMEL MIDDLE LAYER: Put all the ingredients in a medium-sized saucepan and very gently bring to a boil. Boil gently for 6-7 minutes, stirring all the time, until it becomes a nice brown, caramel color. When brown, pour over your baked shortbread (still in the 9×9 tin) and leave to cool.

– CHOCOLATE: Break up the chocolate into a microwave safe bowl and microwave in 15 second intervals, stirring every time, until nice and creamy. Pour over the shortbread and caramel layers, and allow to harden and cool.

Once nice and cool (I usually put mine in the fridge because I’m impatient!) slice into about 20 or so squares. Store in an airtight cookie tin or tupperware. We’ve been storing ours in the fridge because I like cold chocolate, but you don’t have to. I’d tell you how long these keep, but I honestly don’t know because for as long as I’ve been eating them (pretty much as long as I’ve been alive), they’ve always disappeared too quickly. Enjoy these yummy treats with a nice cup of coffee, or as I like to do, a cup of good English tea.


My Mama’s Caramel Delights

Eleni’s Special Pasta

My three year old absolutely loves to watch cooking shows. From those little one minute clips on Facebook by pages like Delish and Tasty to The Great British Bake Off, she is all about it! A few days ago we were watching Giada at Home (one of her favorites) on Netflix, and she decided that she wanted to make Giada’s Calabrian Chile Pasta. As Giada says on that episode, the pasta is a bit too spicy for little eaters, so Eleni and I decided to make our own version. We took away ingredients, and added ingredients, until we came up with something that was ridiculously delicious. This meal tasted like it came from a true Italian restaurant, it didn’t cost much to make, and it was ready in less than 20 minutes! For an even cheaper and easier meal, you could happily leave out the chicken and it would still tastes as good! I hope you enjoy.

elenis-special-pasta

1 box (1lb) penne pasta

Half an onion, chopped

2 cloves of fresh garlic, crushed or finely chopped

1 cup of freshly grated parmesan cheese

A punnet of baby tomatoes, quartered lengthwise

About 3-4 tbsp canned tomato sauce

The zest of 1 lemon

The juice of half a lemon

About 3 large chicken breasts, cooked and sliced (I roasted three big chicken breasts earlier in the afternoon with olive oil, italian seasoning, salt, pepper, and a light sprinkle of chili powder)

A handful of fresh spinach, finely chopped

A glug or two of extra virgin olive oil

Salt and pepper, to taste

– Bring 4 cups of water with some salt to a boil in a roughly 10-inch, high-sided, shallow saucepan. Once the water is boiling, add in your penne pasta and keep it at a loose boil for about 9 minutes, until the pasta is just al dente. Meanwhile, saute the garlic and onion in a glug of olive oil in a separate pan.

When the pasta is cooked lower the heat, add in your garlic and onion, and then throw in the parmesan cheese to coat the pasta, until the cheese is just about melted.  Then add the quartered tomatoes, the tomato sauce, the zest and juice of our lemon, and the chicken. Stir well and allow to heat through (especially the chicken, as you don’t want to reheat chicken halfway – that could be dangerous!). Right at the very end, add another small glug of olive oil, the spinach and salt/pepper, and serve with some more fresh parmesan grated on top! Enjoy… our family sure did!

Eleni’s Special Pasta

Chunky Cereal Bars with Banana, Peanut Butter and Chocolate

image

Hey everyone!

I made these cereal bars for the first time the other day and they are delicious! I individually wrapped them in wax paper before I put them in my Tupperware container so that I could just grab one and run. My family and I are going through a very busy season, and it seems that the first appetite that gets neglected is mine! I’m still intentional about dinners, but lunches and breakfasts kind of get thrown to the side in the midst of the chaos. I know this is the case for so many stay-at-home mamas, so here is a quick, cheap, easy recipe to help you out!

image

The inspiration and basic recipe for these bars came from the Sweet Phi blog, but as always, I made a few tweaks of my own. The original recipe called for 1/2 a cup of dried cranberries and I wish I’d had them! I totally thought I did, but when I got home they were nowhere to be found. My bars are yummy without them, but man I do love dried cranberries…

image

2 tbsp honey

1/2 cup of peanut butter (creamy!)

1 tsp vanilla extract

2 bananas, mashed with a fork

1/4 cup brown sugar

2 1/4 cups rolled oats

1 cup rice krispies

1/2 cup dark chocolate chunks (I just buy big bars of chocolate and chop them myself)

1/4 cup chopped pecans

– Preheat yout oven to 350 degrees Fahrenheit. Line a 9×13 inch pan with wax or parchment paper.

Put your peanut butter, honey and vanilla extract in a microwaveable bowl and microwave for about 30 seconds until you can mix it together easily. Add the mashed bananas and brown sugar, and stir to combine. Then add the rest of your ingredients (oats, rice krispies, chocolate and nuts) and stir quite well. Don’t worry if the mixture is stiff and difficult to stir!

Plop this into the 9×13 inch pan and press it down so that it’s nice and evenly spread out. Bake for 25 minutes or until the edges are a toasty golden brown. Allow it to cool completely before using a sharp knife to cut it into approximately 20 bars. Store these in an airtight container in the fridge.


Chunky Cereal Bars with Banana, Peanut Butter and Chocolate

Roasted Veggie Tacos!

image

We try to eat vegetarian dinners at least once a week for a few reasons, mainly to save money here and there! Last week I went out on a bit of a limb and decided to make tacos, but with roasted vegetables instead of meat. Not only were they healthy and completely delicious, I LOVE how they bring the family together – having all the dishes in the middle of the table and seeing everyone’s hands stretching out to fill their tacos…..dreamy! There’s something magical about all those flavors, colors and smells gathered together on the dining room table – good for the soul I say. Chris absolutely LOVED these and even requested them again for this week, so I decided to make them tonight and take some photos to post. We served our tacos with tortilla chips and pico de gallo. It seems a bit silly posting a recipe as simple as this one, but I get so much inspiration from seeing what others cook, maybe this will inspire you too! Anyway, here’s the recipe – super easy, healthy, and relatively cheap!

image


Ingredients (serves 4):

2 zucchini, diced

1/2 an onion, sliced

1 red bell pepper, sliced

1 orange bell pepper, sliced

1 package cremini mushrooms, quartered

1 package white button mushrooms, peeled but left whole

4-6 cloves of fresh garlic, peeled

4 Roma tomatoes, chopped

Olive oil

Chili powder

Salt and pepper

1 can sweetcorn, drained

1 can black beans, drained

Limes

Soft small tacos (we used two packs because the boys ate 11 between them, and Eleni and I polished off 5!)

Whatever fillings you want (we did sour cream, fresh spinach, cilantro, lime juice, pico de gallo, I totally wanted Cotija cheese but I couldn’t find any!)

– Preheat your oven to 425 degrees Fahrenheit. Lug some olive oil onto a baking sheet, and put all your veggies (apart from the beans, sweetcorn, spinach and cilantro) on there. Season with salt, pepper and about a tablespoon of chili powder. Throw that in the oven for about 25 minutes or until the vegetables are tender (halfway through, stir it up a bit). 

While they’re in the oven, heat up your sweetcorn and black beans in a saucepan on the stove and chop your spinach, cilantro etc. I like to put all my fillings in separate little bowls and arrange them in the middle of the table. The more mismatched the cuter I think, so don’t worry if you don’t have fancy sets of serving bowls! 

When the veggies are done throw them in a serving bowl with the beans and sweetcorn, discard the garlic cloves if you’re not into that kind of thing and just want the general flavor, and squeeze the juice of one lime over the top. Maybe add some more salt, pepper and chili powder if you think it’s needed, taste as you go and follow your gut! Heat up your soft tacos and go for it!

image


Roasted Veggie Tacos!

Italian-Style Chicken Quinoa Bake

image

I got the original recipe for this on the Alida’s Kitchen blog, but I’ve made a few of my own tweaks. This is another great recipe to share with friends – I often take this to people who need a meal after having a baby, or surgery, or just an intense season of life! One of the things I love about it is that it can be made up and assembled in advance, and then the recipient (or you!) can just store it in the fridge until they’re ready to throw it in the oven and eat! You can even make it the night or the morning before…..can I get a hallelujah?! We like to serve this on a bed of fresh spinach for extra goodness and difference in texture. This recipe serves four to six, so I usually double it if I’m taking it to someone, that way we can eat some too! In fact, Chris took the leftovers on a climb the other day and said it was perfect for that kind of situation – providing plenty of protein and fuel for energy!

Ingredients:

4 or 5 boneless, skinless chicken breasts

2 cups quinoa, cooked

1 and 1/2 cups of pasta sauce (like a marinara…or I used Tomato Basil)

1 red bell pepper, chopped small

1/2 an onion, chopped small

A lug of olive oil

1 cup baby tomatoes, halved

A handful of fresh basil, chopped

2 cups shredded mozzarella cheese

Salt & pepper to taste

– Preheat your oven to 375 degrees Fahrenheit. Grease a baking dish (something like a 9×13 inch) In a pan, sautée the onions and red bell pepper in olive oil. After a few minutes, add the chicken. After the chicken is cooked, shred or chop it up. 

Combine the cooked quinoa, chicken, seasonings, pasta sauce, about half of the basil and 1 cup of the cheese. Put half of the quinoa mixture into your baking dish, and top with half of the tomatoes and half a cup of cheese. Top with the remaining quinoa mixture, the remaining cheese and tomatoes, and the rest of the basil. If you want you can add a little grated parmesan too. 

Cover with foil and bake for 15 mins, then uncover and cook for another 10 or so minutes until the cheese is melted and bubbly. (I always put this last sentence on a note for the family I’m taking the meal to, so they know that they can eat it on their own schedule) Serve on a bed of fresh spinach if you wish and enjoy!

image

Italian-Style Chicken Quinoa Bake

Fiesta Rice Salad

image

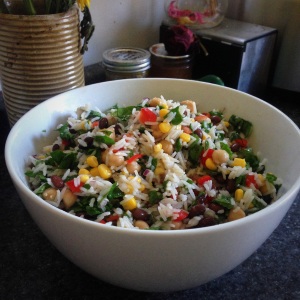
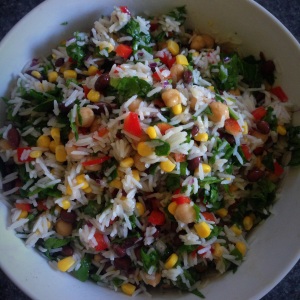
This “salad” is my go-to at the moment to take and share at potluck type meals with friends. Every single time I make it I have people asking me for the recipe, so I figured it was time to put it on the blog! Not only is it something different, it’s also good for you and it contains one of Eleni’s all time favorite foods – chickpeas! I’ve had people tell me that they really thought they hated chickpeas until they ate this….so don’t knock it ’til you try it! I often double the recipe if we’re going somewhere with a big crowd, since it’s quite cheap to make too. At home we’ve had this with thick juicy steaks, chicken or burgers, but honestly it’s quite good by itself for lunch!

Ingredients:

4 or so cups of cooked basmati rice (which is like 2 cups uncooked)

1 can whole kernel sweetcorn, drained

1 can chickpeas, drained

1 can black beans, drained

1/2 red onion, chopped very small

1 red bell pepper, chopped small

3 or 4 big handfuls of raw spinach, chopped

The juice of 1 lemon

Salt to taste

Pepper to taste

– Mix all together in a big bowl, and serve or refrigerate until you’re ready to eat. Easy peasy! If it seems sticky or too dry, add a drizzle or two of olive oil or an extra squeeze of lemon before serving.

image

Fiesta Rice Salad

Potato, Pea and Bacon Pie – A Fall Must-Have!

 imageimage

This is one of my favorite pies ever….this is high in comfort and indulgence! I’ve adapted this recipe from Jamie Oliver’s Puffy Pea ‘n’ Potato Pie – the original concept came from him, but I’ve changed quite a bit and added my own flair. Serve all on its own as a main dish, or leave off the puff pastry at the end and you’ve got a beautiful side dish that guests will adore.

Ingredients:

2 tbsp all purpose flour

One sheet of puff pastry (they usually sell boxes of two sheets in the frozen section)

1 egg, beaten

1 onion, chopped

2 large potatoes, chopped into small cubes

500g frozen peas (a regular sized pack)

1 large knob of butter (probably about 2 tbsps)

1/2 a large iceburg lettuce, finely shredded

1 cup chicken stock

4 heaped tbsps ricotta cheese

A pack of cooked bacon, chopped into small pieces

– Preheat the oven to 400 degrees Fahrenheit. 

Throw your onions in a pan with a generous lug of olive oil. Cook for about 5 minutes until starting to soften, then add the potatoes into the mix. Stir pretty well and cook for a few minutes more before adding the peas, butter and flour. After a few minutes add the lettuce and the bacon and cook over low-medium heat for about another 10 minutes, stirring regularly. Add the chicken stock and bring to a boil, then reduce to a simmer for another 10 or so minutes until the potato is cooked. Stir in the ricotta cheese well and season with salt and pepper to taste.  

Pour the entire mixture into a pie dish and cover with the puff pastry. With a pastry brush, paint the pastry with the beaten egg and use a knife to cut a slit into the middle of the pie. Bake at 400 degrees for about 15 minutes until the pastry is golden brown and puffed up. Enjoy!

Painting the pie

Potato, Pea and Bacon Pie – A Fall Must-Have!

HEALTHY Loaded Sweet Potatoes

image

I’m kind of in love with this recipe, because it’s easy, fresh, loaded with protein & other good stuff and obviously very yummy! Plus look at those amazing colors – anyone you serve this too will feel special, I guarantee it! This can stand alone or be a side dish – I’ve done it both ways.

Ingredients: (serves 2)

2 baked sweet potatoes

A handful of fresh spinach, chopped

Half a can of drained whole kernel sweetcorn

Half a can of drained black beans

Half a can of drained chickpeas

Half a red bell pepper, chopped

A squeeze of lemon juice, to taste

– Combine all the ingredients except for the sweet potatoes into a small bowl and season with salt and pepper. Stuff your sweet potatoes with this mixture and you’re done….it’s that easy! You may have some leftover filling which is delicious on its own or good as a starter for a salad of leftovers the next day. Enjoy!

HEALTHY Loaded Sweet Potatoes